
WeMos D1mini ArduinoIDE EscapeQuotes
Welcome to this introductory tutorial on using the WeMos D1 Mini microcontroller to light up its onboard LED. The ESP8266 is a low-cost Wi-Fi module that makes it easier than ever to add Wi-Fi functionality to your projects. In this tutorial, we will cover the following steps: Hardware setup Installing required software Configuring the Arduino IDE for
LOLIN D1 mini — WEMOS documentation
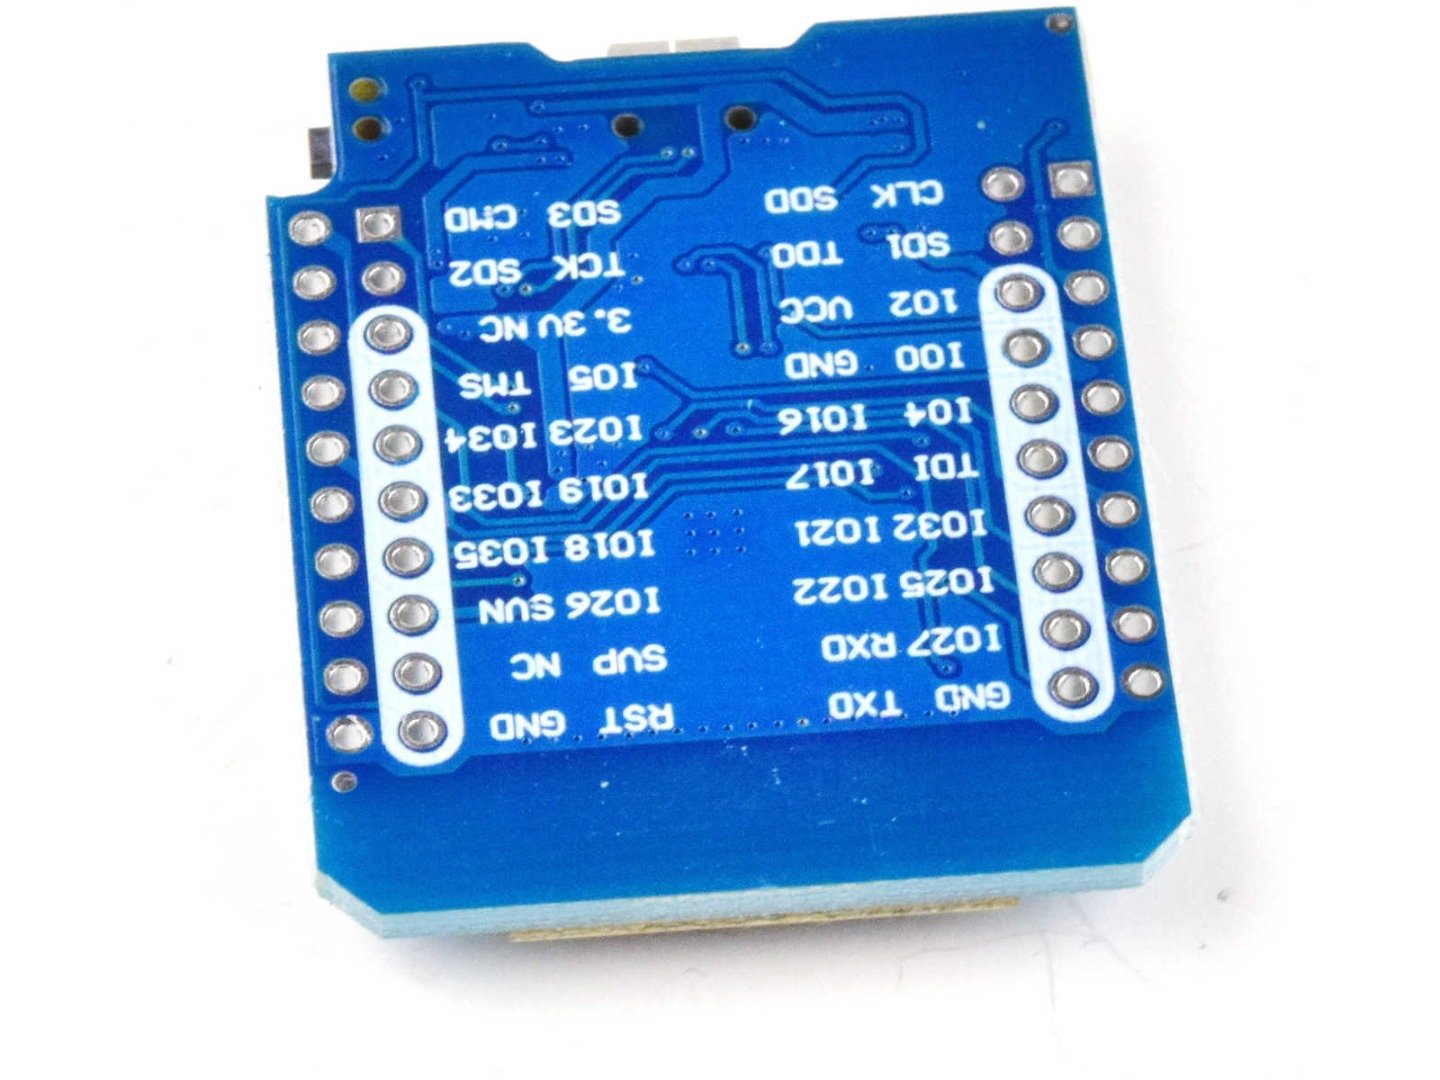
Wemos-D1-mini-Blink-LED. This is my first blog on WEMOS D1 mini, and what were the various parameters like board manager etc are listed here. This a 16 pin ESP8266 compatible WiFi module and can be used like any other wifi module like ESP8266 and ESP32.
Computers/Tablets & Networking Motherboard & CPU Combos WeMos D1 R2 WiFi UNO Based ESP8266 For
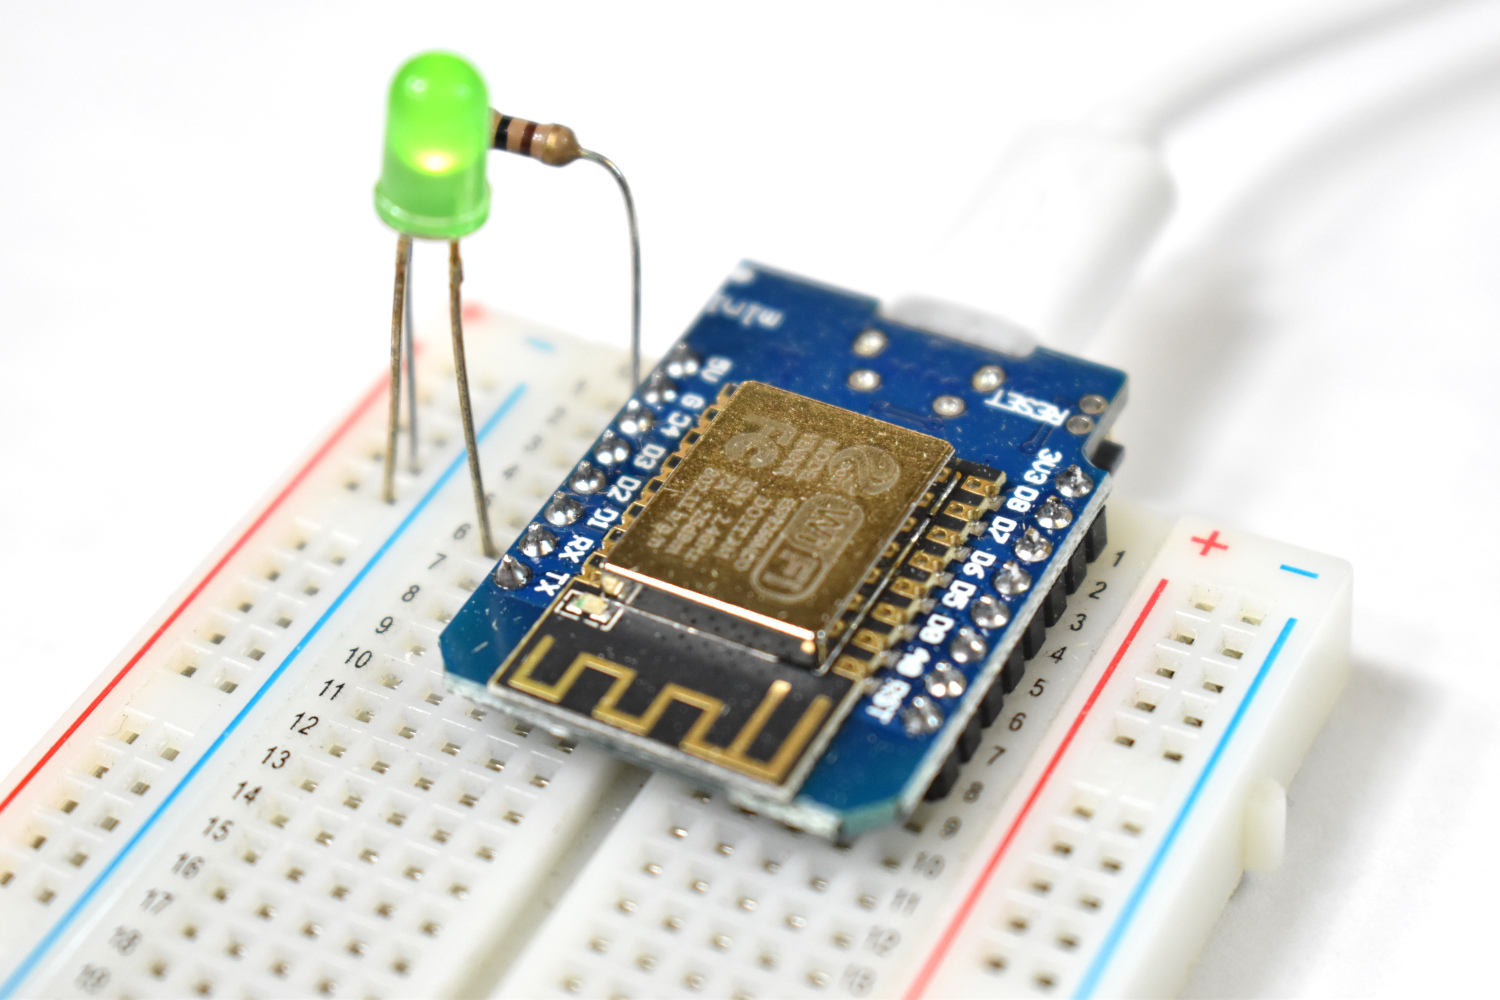
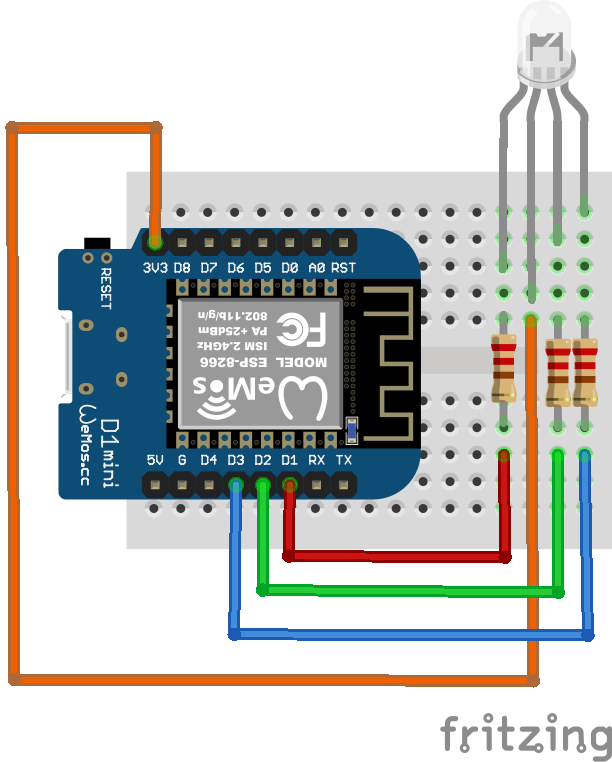
Connection: Connect +5V of ESP8266 common to breadboard and one pin of the LDR. Connect the other pin of the LDR to A0 (analog pin ) and one pin of the 100KΩ resistor. Connect the other pin of the 100KΩ resistor to common GND of ESP8266. Connect the 220ohm resistor to the long leg (+ve) of the LED on the breadboard.
WEMOS D1 Mini ESP32 Minikit Dual Core 240MHz WiFi Bluetooth
To make webserver page interactive with ESP8266 module we need to used http post request. browser sends a POST request to /LED. When the ESP receives such a POST request on the / PIN number URI, it will turn on or off the LED, and then redirect the browser back to the home page. To send the POST request in the web browser is made of an HTML form.

Placa de desarrollo WeMos D1 Mini basada en ESP8266
Step 1. Plug the D1 Mini into your Mac. The first thing that you need to do is plug the D1 Mini board into your Mac. The board will be powered by the USB cable for this example. So you won't need an external power supply. Plug the USB cable into your laptop. Plug the USB cable into your D1 Mini board. Step 2.
Knöchel ein Feuer anzünden Hoffnungsvoll esp8266 led schalten Zahn Ruhm Kopfhörer
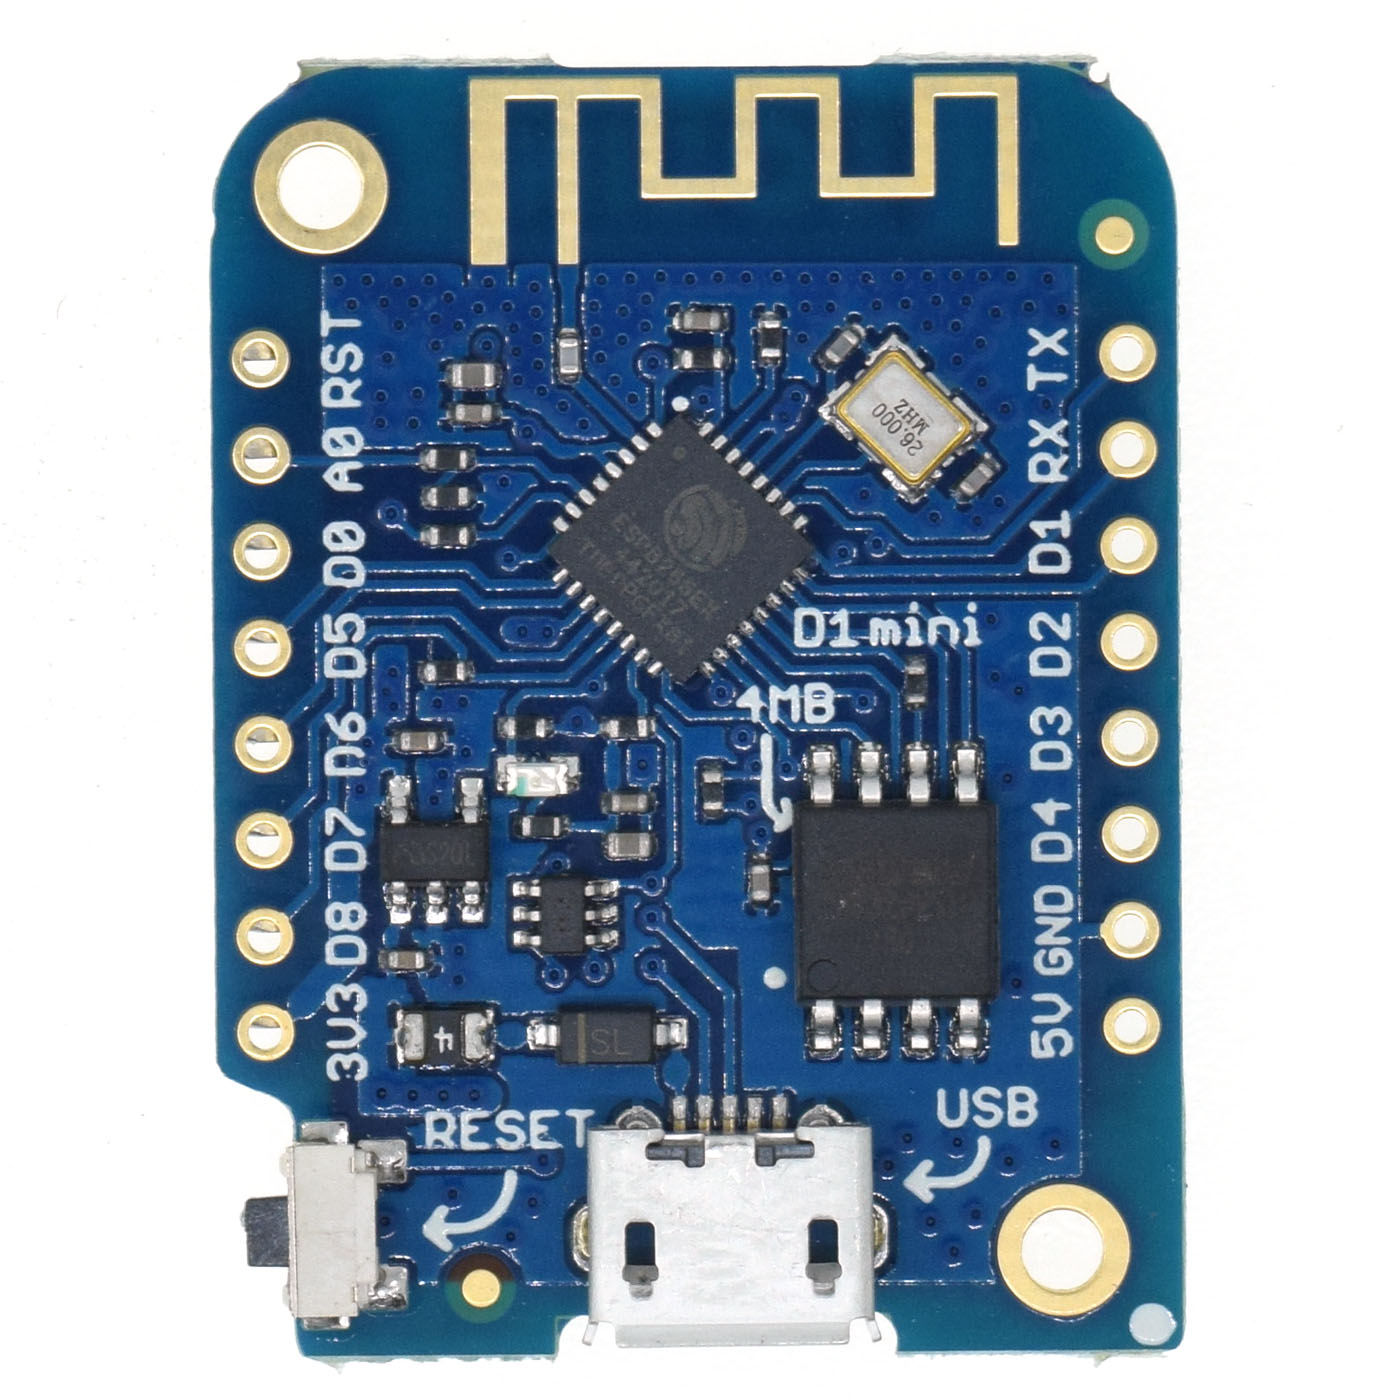
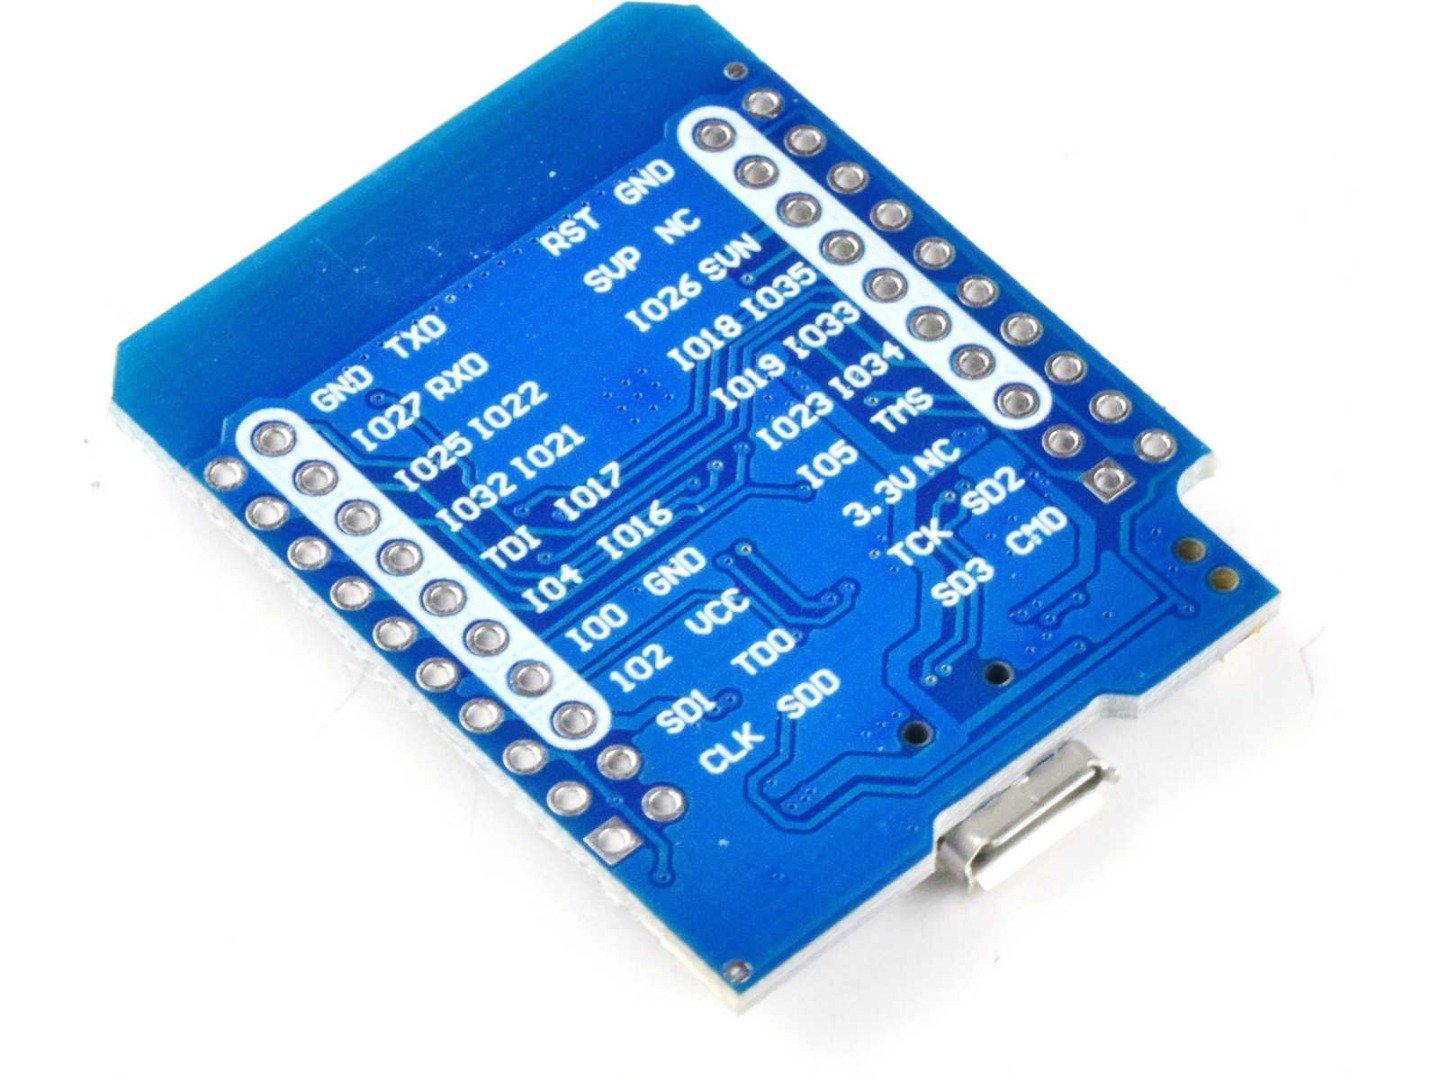
The Wemos D1 Mini board is approximately 1/4 the size of the Arduino UNO! The official boards come in two flavours, the D1 Mini and the D1 Mini lite. The latter is based on the ESP8285 chip where the former is based upon the more common ESP8266EX. The main different between these boards is the amount of flash memory.
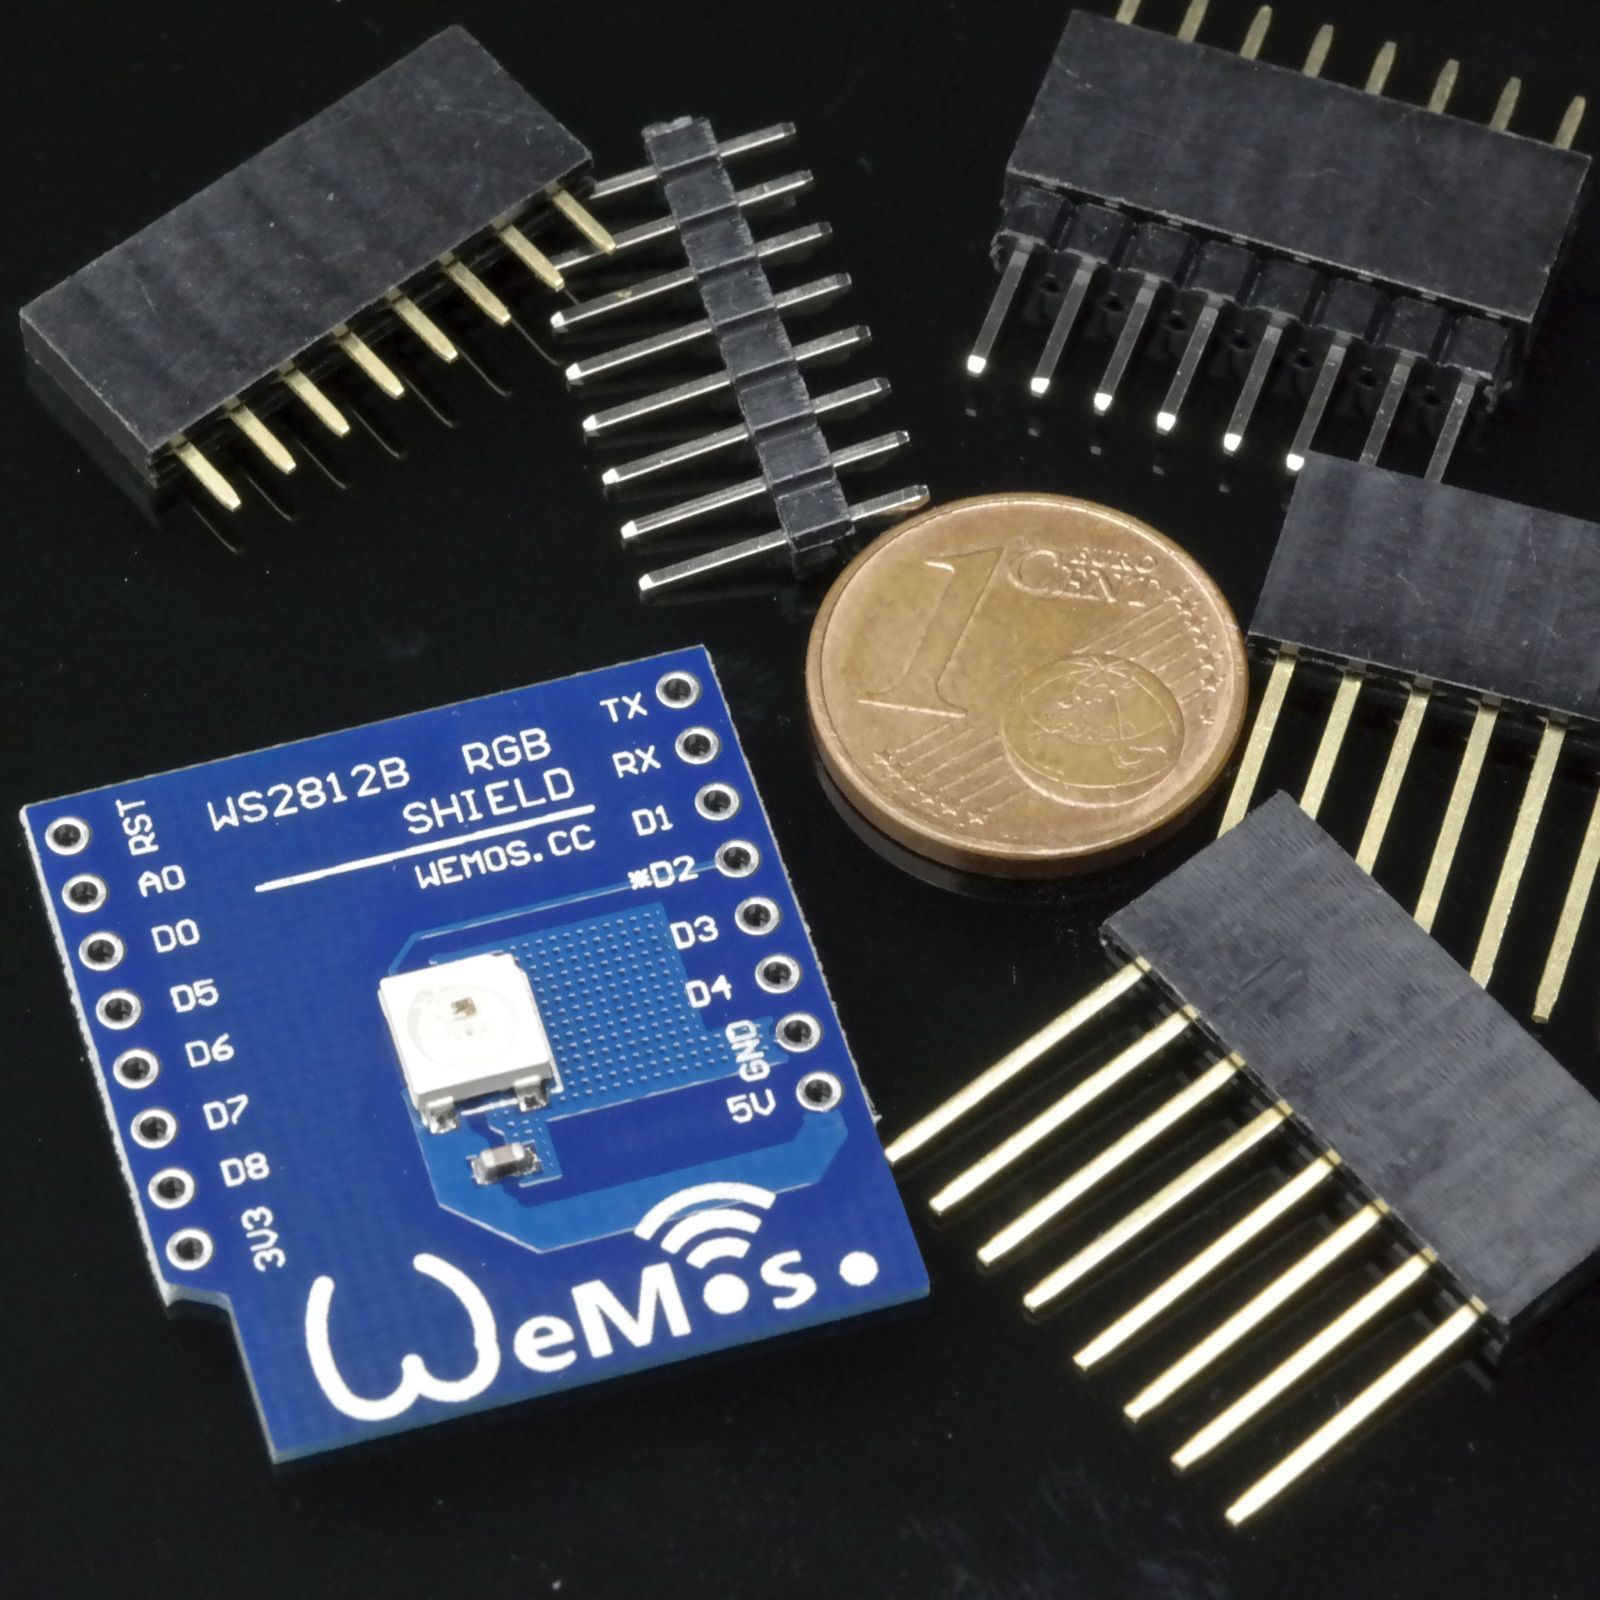
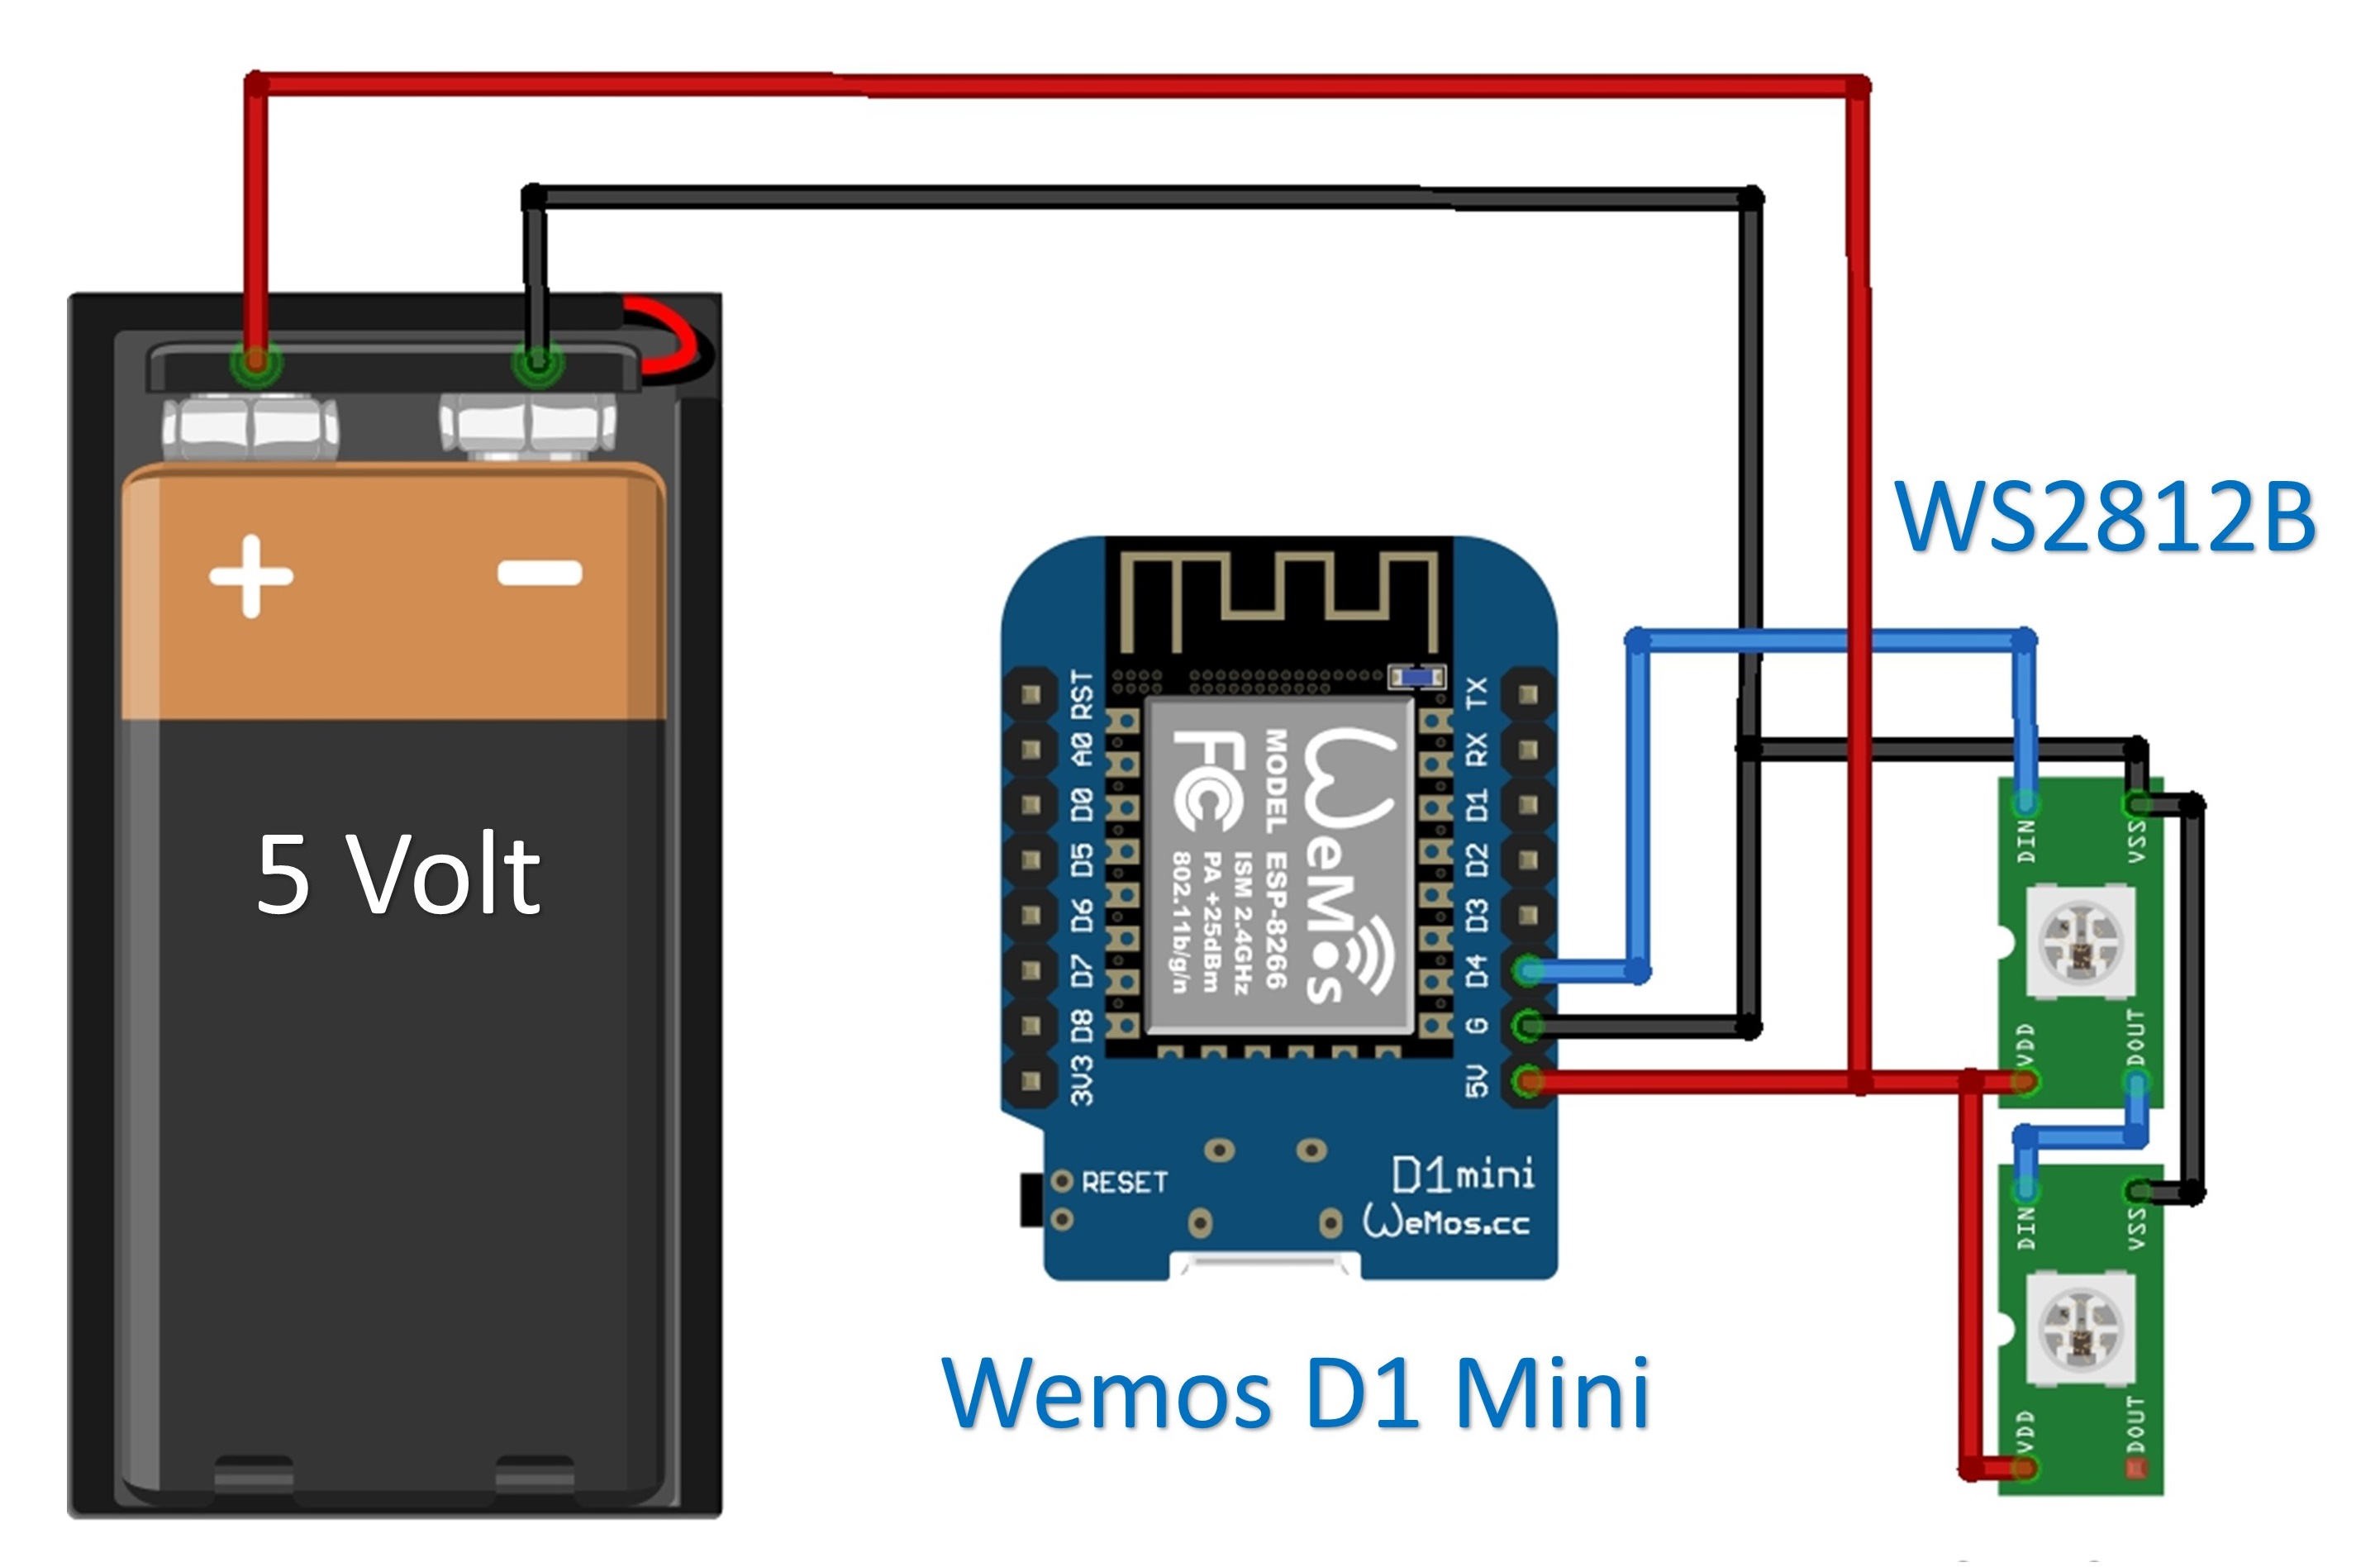
RGB LED Shield WeMos D1 mini WS2812B digital hell ESP8266 node ModuLink Elektronik Läuft
This post describes how to install the board support package for the WeMos D1 Mini board into the Arduino IDE and blink the board's LED. Note A WeMos D1 Mini clone: "IZOKEE D1 Mini NodeMcu Lua 4M Bytes WLAN WIFI Internet Development Board Base on ESP8266 ESP-12F for Arduino, 100% Compatible with WeMos D1 Mini" from [amazon] was used in this example. Description from Amazon: This D1 mini module.

Wemos D1 Mini Boards • Wolles Elektronikkiste
Get started with MicroPython [D1/D1 mini series] Get started with Arduino [D1/D1 mini series]
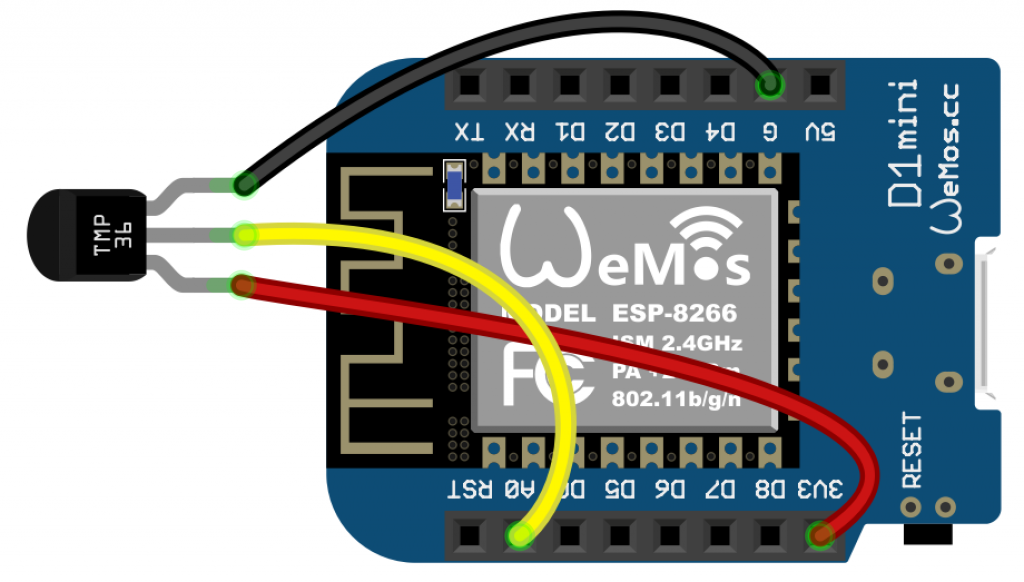
Wireless Remote Sensing with Wemos D1 mini, Arduino IDE, Raspberry Pi and lighttpd web server
Step 10: Run The Project. When you are done with the Settings - press the PLAY button. This will switch you from EDIT mode to PLAY mode where you can interact with the hardware. While in PLAY mode, you won't be able to drag or set up new widgets, press STOPand get back to EDIT mode.
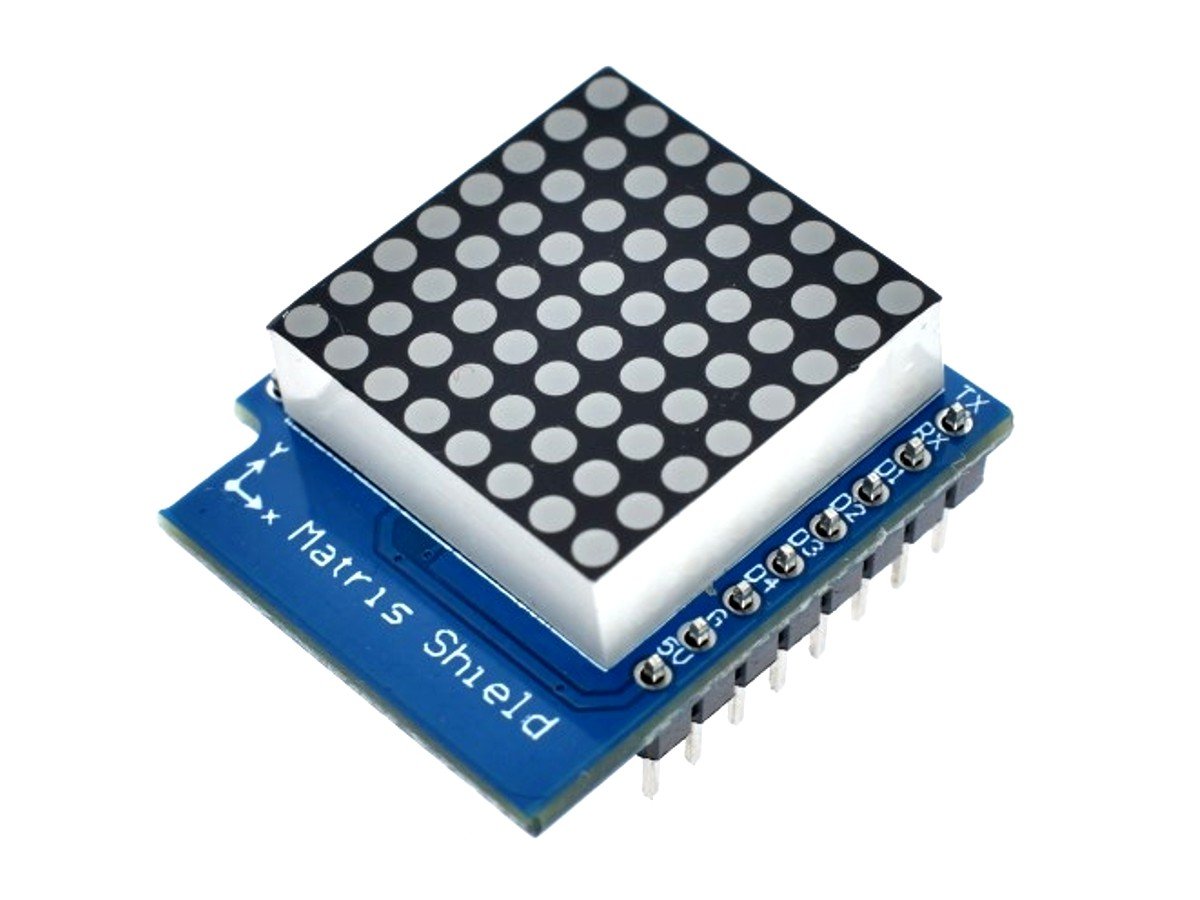
Wemos D1 Mini ESP8266 8x8 LED Matrix Shield TMP1640
Step 1: Wiring for the Wemos D1 Mini to the Dot Matrix Display. The Dot Matrix Display comes with the wires you can use. I simply cut off the plugs and solder them directly to the pin locations on both the LED Dot Matrix Display and to the Wemos D1 Mini. The Dot Matrix will slip into the case and snap in.
Wemos D1 Mini Boards • Wolles Elektronikkiste
Control LED Screen Panel with Wemos d1 mini.. ESP8266 Board (Wemos or NodeMCU). 2. P10 LED Display Panel. 3. 5v Power Supply (power to led panel). 4. Jumper wires Step 02 :Wiring Connection.

Pin on Projects
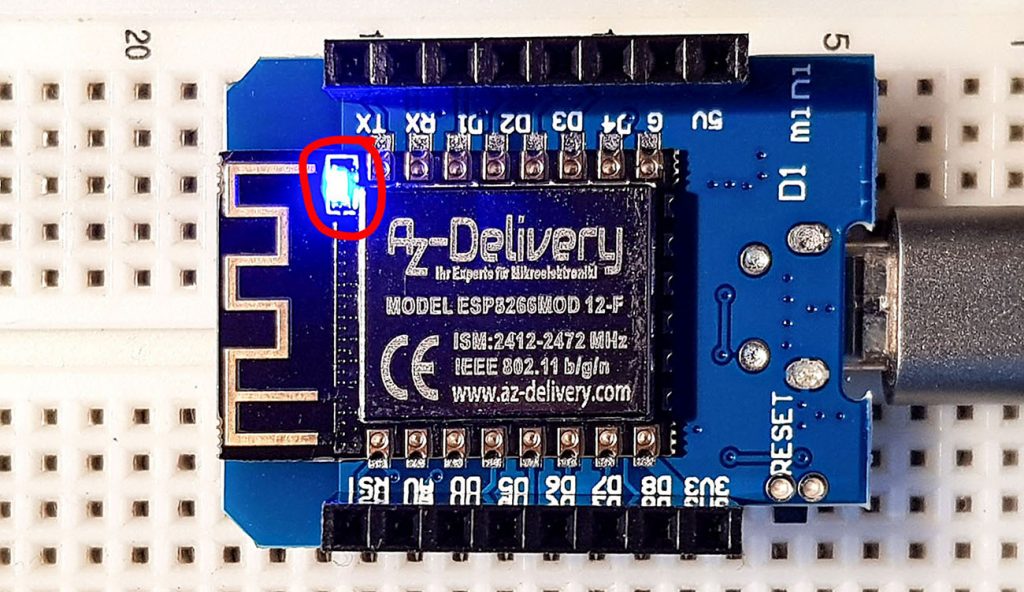
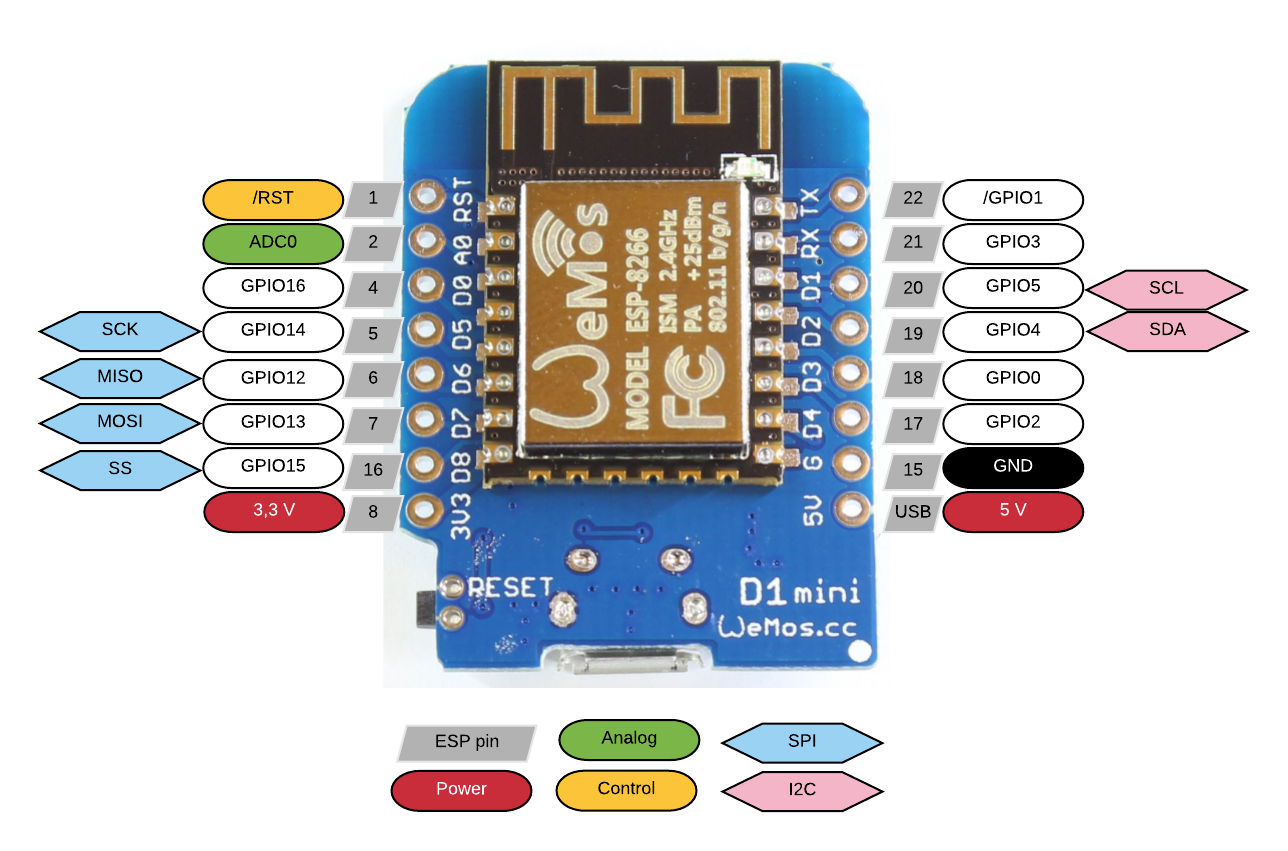
The WeMos D1 Mini has all communication standards on board: 1x UART; 1x I2C; 1x SPI; Component Amazon Link AliExpress Link; ESP8266 WeMos D1 Mini: Amazon: AliExpress: ESP8266 WeMos D1 Mini Power Supply.. Would be good to mention which pin toggles the onboard blue led of these devices, as 'blink' is one of the first programs people are.
WeMos (4) 1602 LCD i2c 表示 Arduino (ESP8266)
A Wemos LED Matrix shield. Soldering iron and some solder (to attach the pin header, if necessary) A USB-A to Micro-B cable. First you should install the Arduino IDE and set up the Wemos D1 Mini board, in order to be able to program the D1 Mini. You may also need to solder the headers on to both the Wemos D1 Mini and Matrix shield.
Mehrere Überschrift wiederholen wemos d1 mini led strip Überrascht sein verwöhnen Birne
Step 4: Upload your first program. You are now ready to upload your first program to the Wemos d1 mini. Start by opening the "Blink" example sketch from the "File" menu. This sketch will make the built-in LED on the board blink. Click the "Upload" button to compile and upload the sketch to the Wemos d1 mini.

Pin on Wemos
WEMOS latest Boards: D1; D1 mini Shields. Display & Interactive Shields. TFT 2.4; ePaper 2.13. D1 Mini Shields » Matrix LED Shield; Edit on GitHub; Matrix LED Shield¶ 8x8 Matrix LED Features¶ 8×8 dot matrix LED; 8 step adjustable intensity; Pins¶ D1 mini: GPIO: Shield: D5: 14: CLK: D7: 13: DIN:
WEMOS D1 Mini ESP32 Minikit Dual Core 240MHz WiFi Bluetooth
The Wemos D1 Mini series of ESP8266 Wi-Fi microcontroller board is composed of the Wemos D1 Mini, the Wemos D1 Mini Pro, and the Wemos D1 Mini Light. The three (3) microcontroller boards have the same number of General Purpose Input / Output (GPIO) ports. The main difference among them is the amount of flash memory.